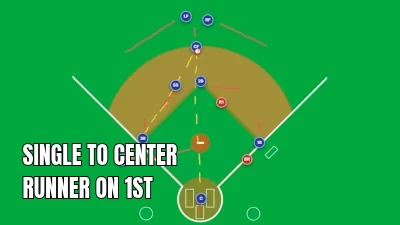
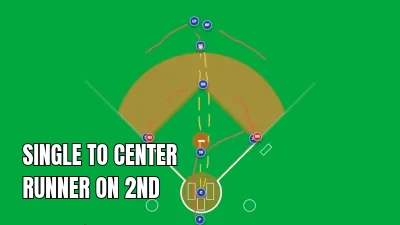
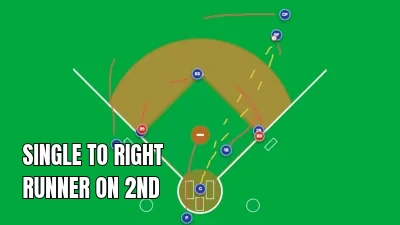
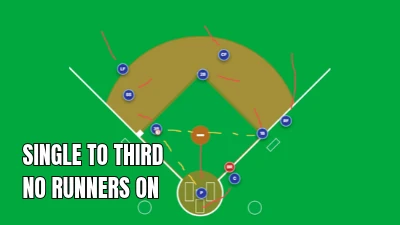
Single To Center Field With A Runner On First Base: Defensive Responsibilities
This article was mainly written for high school or older kids. Some advanced little league or travel teams may be able to use this as well. It really depends on the strength of your outfielders' arms.
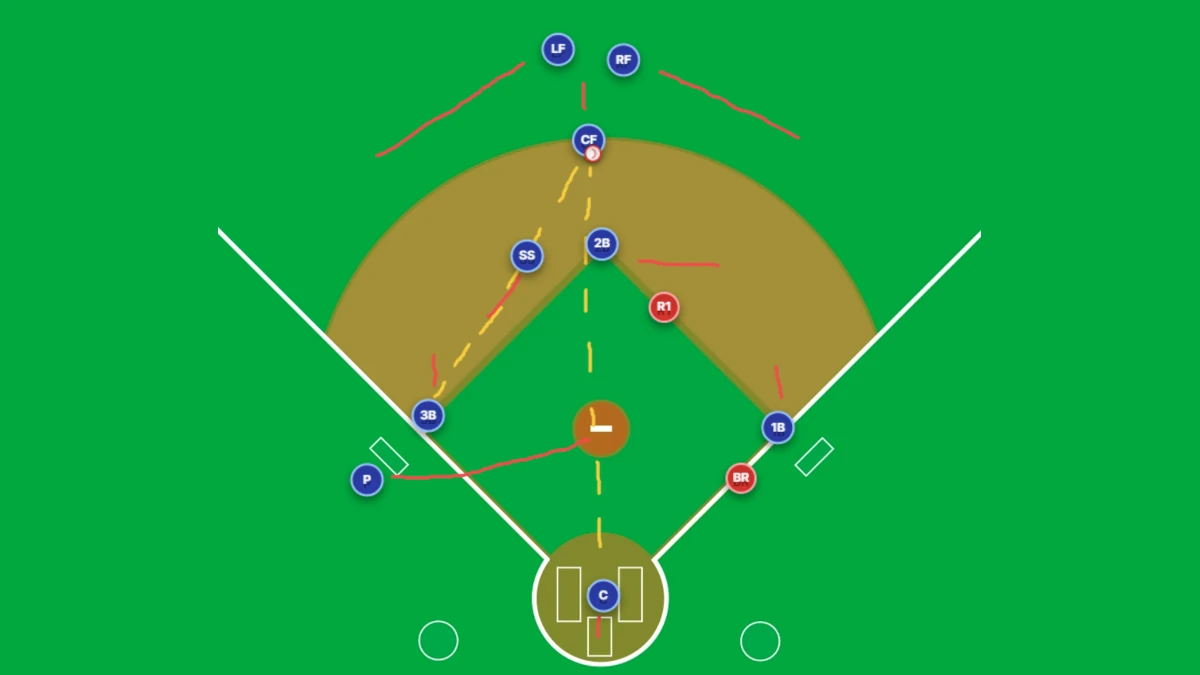
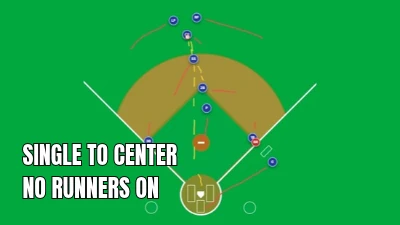
On a ball hit to center field with a runner on first base every player has a job to do. That job is the same no matter how many outs. All defenders should be moving to their positions prior to the ball touching grass or being caught.
As a general concept, on a ball hit to the outfield we are thinking two bases ahead of the lead runner. With the lead runner on first we are thinking third base.
Play Responsibilities
| Position | Primary Responsibility |
|---|---|
| Shortstop | Align as cut off between the ball and third base |
| First baseman | Cover first and make sure runner touches the bag |
| Second baseman | Cover second in case play develops to 2nd. |
| Third baseman | Cover base |
| Pitcher | Back up the third-base area |
| Catcher | Cover home plate |
| Left fielder | Back up the center fielder based on the ball's direction |
| Center fielder | Fields ball and throws directly to third baseman |
| Right fielder | Back up the center fielder based on the ball's direction |
Left Fielder (LF)
Generally, a ball hit to center field will be the center fielders ball but you should move as if the ball is yours in case it moves closer to left field.
Once you hear the center fielder call for the ball you are to align as back up in case the center fielder misses the ball.
Get to a location where you can grab the ball on a hop or two.
Center Fielder (CF)
Center fielder should start by moving towards the ball. Center fielder has pop up priority. Anything hit to center field is yours.
Call for the ball loudly so the left and right fielders don't get into your way.
If you catch the ball you're most likely throwing directly to second base to prevent the man on 1st from advancing.
If you do not catch the ball you are throwing to third base.
Throw through the cutoff man.
Infield Positioning: Shortstop
The shortstop is the cut off from center with a man on 1st. He should be positioned between the ball and third base.
If the runner is holding at second, the left fielder can throw the ball to the shortstop.
If the runner is going for third the left fielder must field the ball and throw to third base, they are aiming low and straight toward third base, through you.
The shortstop is letting the ball travel directly to third base with a few exceptions:
- If the ball doesn't have enough to carry to third base.
- If the ball is off target.
- If an infielder is saying "Cut 1", "Cut 2", "Cut 3", "Cut 4", you are catching the ball and throwing it to the respective base.
Cut Commands Guide
- Cut 1: Shortstop grabs the ball and throws it to first base.
- Cut 2: Shortstop grabs the ball and throws it to second base.
- Cut 3: Shortstop grabs the ball and throws it to third base.
- Cut 4: Shortstop grabs the ball and throws it to homeplate.
If the ball does have enough carry and no "Cut" command is called, the shortstop is getting out of the way and letting the ball go all the way to the third baseman.
Infield Positioning: 2nd Baseman
You are covering second base and preparing to receive the ball from the center fielder.
You should cover 2nd base but not block the bag in case the runner is coming in.
If there is a play at second base, once you control the ball you are tagging the runner low (expecting him to slide).
Infield Positioning: 1st baseman
The first baseman is covering first base. The first baseman should verify the batter touches first base.
The first baseman should be ready to field the ball (on a passed ball) or receive a throw, if the left fielder, and middle infielders can get the ball to the first baseman fast enough, especially if the runner "turns the corner".
Infield Positioning: 3rd baseman
The third baseman is covering third base. Depending on the depth of the ball and the speed of the batter the play may be cut by the shortstop or thrown directly to you.
There is no force at third, you must tag the runner once you have the ball.
Pitcher
You are behind third base as a backup. You are backup, in case the throw is missed by the third baseman.
You should also be ready to join in a rundown situation, if the runner gets caught off a bag.
Catcher
The catcher is covering home plate.
The catcher is there in case the play develops into a play at the plate.
Right Fielder
Generally, a ball hit to center field will be the center fielders ball but you should move as if the ball is yours in case it moves closer to right field.
Once you hear the center fielder call for the ball you are to align as back up in case the center fielder misses the ball.
Get to a location where you can grab the ball on a hop or two.
Not One-Size-Fits-All
Depending on the strength of your left fielders arm or the depth of the hit this may not work for you.
The outfielder may be required to throw to the cutoff man.
The outfielder should not "feel" they can make the throw. They should "know" they can make the throw. That means they'll need practice, to learn their limits.
Outcomes
| Outcome | What happens next |
|---|---|
| Fly ball caught | If the runner attempts to advance to second after tagging up, the center fielder can throw toward second base. |
| Ball drops safely | Runner on first may try for third. Outfielders field the ball, and the infield executes its cutoff and base-coverage assignments. |
| Ball rolls past the center fielder | Left or right fielder retrieves the ball, and the infield executes its cutoff and base-coverage assignments. |
| Throw to third is off target | Shortstop attempts to gain control. If shortstop misses, Pitcher must stop the ball and prevent the runner from advancing. |
| Base runner overruns third or gets caught between bases | Fielders communicate and execute a rundown, with other defenders covering the appropriate bases. |
Using Biomechanics & Modern Movement Science For Outfielder Throws
The center fielder should develop safe, effectivepulldown Throws rather than relying exclusively on long toss.
Pulldown, or compression, throws provide a different training stimulus than high-arc long toss. They emphasize throwing mechanics, arm speed, and the ability to drive the ball toward a target on a relatively flat trajectory.
To throw the ball hard and on a line, the player must generate high arm speed while coordinating the lower body, hips, and trunk. The goal is to direct momentum toward the target instead of relying on a high release angle to carry the ball farther.
- **Force Direction:** During a pulldown throw, the player builds momentum toward the target and coordinates the drive from the back leg with the rotation of the hips and trunk. The goal is to transfer energy efficiently into the throw while maintaining balance and control.
- **Lead-Leg Stability:** As the front foot plants, the lead leg helps stabilize the body and provides a base for the hips and trunk to rotate. Proper timing and stability help transfer energy through the throwing motion. Avoid forcing the front knee to lock or become rigid; the goal is controlled stability, not an artificially stiff landing.
Prioritize the Mental Game and Autonomy
Great coaches teach more than physical mechanics. They help young players recognize mistakes, make adjustments independently, and stay composed under pressure.
Make sure your players understand their responsibilities, what they can control, and what is expected of them in games. Introduce manageable pressure during practice so they can learn to perform under challenging conditions. Recognize effort, celebrate progress, and reinforce personal improvements rather than focusing exclusively on outcomes.
Give players a 30-second reset after an error. If a player gives their best effort and still makes a mistake, use the moment as a learning opportunity instead of a reason for punishment. Encourage them to acknowledge what happened, let it go, and refocus on the next play.
After an error, teach players to hear and repeat this simple reminder: "You'll get the next one." One of the worst things a coach can do is punish a player for giving 100% effort or mock them for making a mistake. Build an environment where players feel safe taking responsibility, learning from errors, and confidently moving on to the next opportunity.
How To Teach The Play
- Start by whiteboarding out the play or sharing this webpage with every member of your team.
- Move into drills where every player is at their respective positions. Hit the ball to the center fielder and watch everyone move.
- Coach any larger errors before moving into smaller areas of improvement.
- Move into pulldowns for the outfielders, and shortstop.
Practice drill: Line Drive to Center Field
Practice what happens when everything goes right but also practice what happens when things go wrong. Inform a player to make a mistake.
Queitly tell the center fielder to miss the ball or tell them to make a bad throw.
Watch and coach when everything goes right and coach when everything goes wrong.
- Focus on communication, the cutoff, and backup positioning.
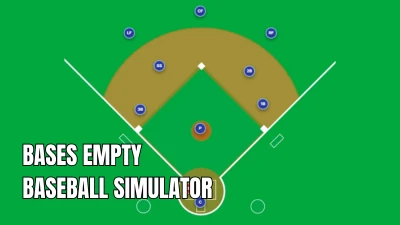
- Position all nine players on the field with a runner on 1st.
- Hit a ball to left field and have players execute their assignments. Repeat until they get it right.
- Inform a player to make a mistake (Left fielder misses the ball, bad throw to the infield, etc.) Repeat until everyone knows what to do when everything goes wrong.
More Details On How To Use the Play Simulator
Need complete step-by-step instructions on how to use the play simulator? View Full Documentation →